Author Archives: admin

The music has stopped, the guests have gone home, and you’re left with a sink full of glasses, a floor covered in crumbs, and a serious “hosting hangover.” We’ve all been there. While the memories of a great party are wonderful, the physical aftermath can feel overwhelming.

But cleaning up doesn’t have to take all weekend. With a strategic plan, you can restore your home to its former glory in record time. Here are our top professional tips for a stress-free post-party cleanup.

1. The “Night-Of” Essentials

Before you head to bed, there are three things you should do to make the next morning significantly easier. Resist the urge to dive into a deep clean, but don’t ignore these basics:

  • Tackle the Perishables: Clear away any leftover food. Pack up what can be saved and toss anything that has been sitting out too long.
  • The Soak Method: Fill the sink with hot, soapy water and drop in the hardest-to-clean dishes or serving platters. This prevents food from hardening overnight.
  • Spot Check for Spills: Check the carpets and upholstery for red wine or sauce stains. These are much easier to remove when they are fresh. Blot (don’t rub!) with a clean cloth.

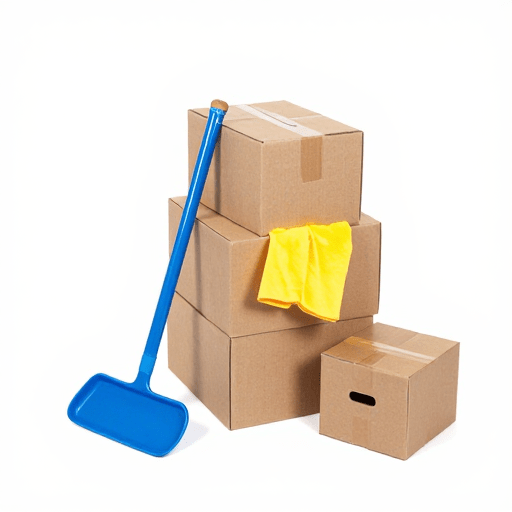
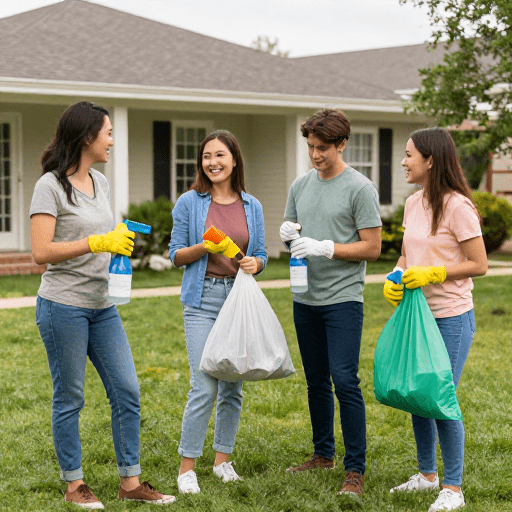
2. Start with a “Trash Sweep”

When you wake up the next morning, grab a large heavy-duty trash bag and do a lap of the entire house.

Don’t worry about organizing or scrubbing yet. Simply focus on gathering bottles, cans, napkins, and disposables. Removing the bulk of the “clutter” provides an immediate visual win and makes it easier to see which surfaces actually need cleaning.

3. Empty the Dishwasher First

In the world of professional cleaning, the dishwasher is your best friend. Start your morning by emptying it if it was running overnight. Having an empty dishwasher ready to be loaded is the key to clearing your kitchen counters quickly.

Pro Tip: Wash your delicate glassware by hand, but let them air dry on a clean towel while you focus on the sturdier items.

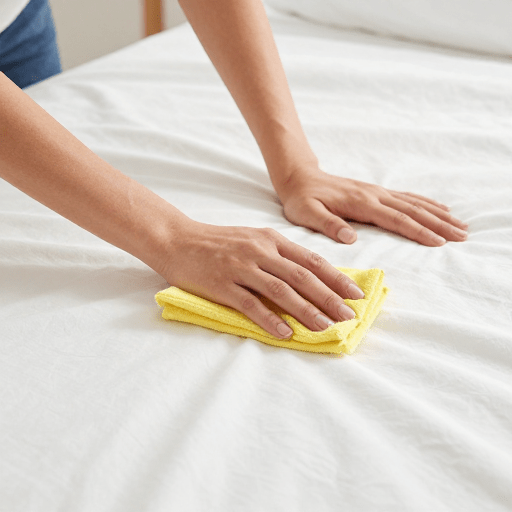
4. Work from the Top Down

When you start cleaning surfaces, follow the professional’s golden rule: Clean from top to bottom.

Dust and crumbs fall as you clean. Start by wiping down tables, countertops, and mantels. Use a microfiber cloth and an all-purpose cleaner. Save the floors for the very last step so you aren’t walking over areas you just vacuumed or mopped.

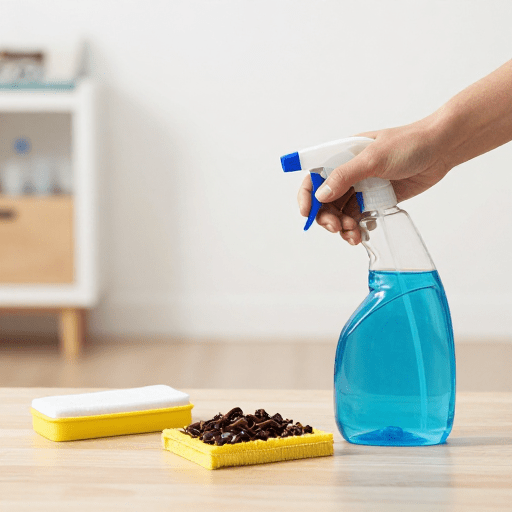
5. Don’t Forget the “Guest Zones”

The bathroom likely saw a lot of traffic during the party. Give it a quick refresh:

  • Swap out damp hand towels for fresh ones.
  • Wipe down the mirror and faucet.
  • Sanitize the toilet handle and seat.
  • Check the floors for any stray paper or spills.

6. Neutralize Party Odors

Even if your house looks clean, it might still smell like a party. Stale food, perfume, and drinks can linger in the air.

Open the windows for at least 15 minutes to get a cross-breeze going. If it’s too cold, simmer a pot of water on the stove with lemon slices and rosemary, or light a high-quality soy candle to neutralize odors rather than just masking them.

7. The Final Floor Sweep

Once the counters are clear and the trash is out, it’s time for the floors.

  • Vacuum first: Even on hard floors, a vacuum picks up crumbs and glitter better than a broom.
  • Mop second: Use a damp mop with a mild cleaner to get rid of any “sticky spots” where drinks might have splashed.

The Secret to Next Time: Pre-Party Prep

Want to make your next cleanup even faster?

  • Empty the trash cans before the party starts.
  • Empty the dishwasher before the first guest arrives.
  • Set out “spill stations” (coasters and napkins) in plain sight.

Welcome to the beautiful, exhausting, and slightly chaotic world of parenthood. If you’ve recently brought home a newborn, your “to-do” list has likely been replaced by a “survive-the-next-hour” list. Between the feedings, the diaper changes, and the desperately needed naps, the state of your home can quickly become a source of stress.

However, keeping a clean home with a newborn isn’t about achieving Pinterest-perfection; it’s about maintaining a healthy, safe environment while preserving your sanity.

Here is a professional guide to managing the mess during the “fourth trimester.”

1. Prioritize “Safe” Over “Sterile”

With a newborn, your focus shifts from aesthetics to air quality and surface safety. Traditional cleaning products often contain harsh VOCs (volatile organic compounds) and synthetic fragrances that can irritate a baby’s sensitive respiratory system.

  • Switch to Green: Opt for plant-based, fragrance-free, and non-toxic cleaners.
  • The Power of Steam: A steam mop is a great investment. It sanitizes floors using only water, eliminating the need for chemicals where your baby will eventually be crawling.

2. The “One-Room-a-Day” Rule

The days of the “Saturday Deep Clean” are over—at least for now. Instead of trying to tackle the whole house, choose one priority zone per day.

  • Monday: The nursery surfaces.
  • Tuesday: The kitchen counters.
  • Wednesday: A quick bathroom wipe-down. By breaking it into 15-minute bursts, the house stays manageable without leading to burnout.

3. Master the “Continuous Loop” Laundry System

Newborns create a staggering amount of laundry. To prevent the “Mount Washmore” effect, aim for one load of laundry per day, from start to finish.

  • Wash, Dry, Fold, Put Away: Don’t let the clean clothes sit in the basket.
  • Switch to Sensitive Detergent: Use a “free and clear” detergent for the entire household. This saves you the time of sorting the baby’s clothes from yours, and it ensures that when the baby cuddles against your shirt, their skin isn’t irritated by your perfume-heavy detergent.

4. Create “Cleaning Stations”

When you are sleep-deprived, efficiency is your best friend. Set up small cleaning kits in the areas where you spend the most time:

  • The Changing Station: Keep disinfecting wipes and hand sanitizer tucked away (out of baby’s reach) to quickly clean the changing pad after a “blowout.”
  • The Kitchen: Keep a dedicated basin for bottle and pump parts so they don’t get lost in the sea of adult dishes.

5. Focus on High-Touch Surfaces

If you only have five minutes to clean, ignore the dusty baseboards and focus on the surfaces that actually harbor germs:

  • Doorknobs and light switches.
  • The handles of the refrigerator and microwave.
  • Your phone (which likely touches your face and the baby’s environment constantly).

6. Accept “Good Enough”

This is perhaps the most important tip: Lower your standards. If the dishes are clean but still in the dishwasher, you’ve won. If the floors are swept but the windows are streaky, it’s okay.

A newborn needs a present, rested parent more than they need a dust-free bookshelf. If friends or family ask how they can help, don’t be afraid to ask them to fold a load of laundry or load the dishwasher. People genuinely want to be useful!

7. The 10-Minute Reset

Before you head to bed (or whenever your “long” stretch of sleep begins), do a 10-minute “reset.” Clear the coffee mugs, toss the used diapers, and straighten the couch cushions. Waking up to a semi-organized living space provides a significant mental health boost for the day ahead.

Final Thought

The newborn stage is a season of life, not a permanent state. Your house will be pristine again one day, but your child will only be this small once. Focus on the essentials, breathe through the mess, and remember that a “lived-in” home is simply a sign of a life being shared.

Happy nesting!


Moving to a new home is a whirlwind of emotions. Between the excitement of a fresh start and the exhaustion of packing boxes, cleaning is often the last thing on your mind. However, a thorough clean is the bridge between your old life and your new beginning.

Whether you’re trying to get your security deposit back or ensuring your new sanctuary is truly “move-in ready,” here is your ultimate guide to cleaning when moving.

Part 1: The Move-Out Clean (Leaving on Good Terms)

If you’re a renter, this is about getting your money back. If you’re a seller, it’s about courtesy and fulfilling your contract. The goal here is to leave the home in “broom-clean” condition—or better.

1. Empty Everything First

It is nearly impossible to deep clean around boxes. Once the moving truck is loaded, do a final sweep. This allows you to see the “hidden” dirt that lived under the sofa for three years.

2. The “Top-to-Bottom” Rule

Always clean from the ceiling down. Dust the ceiling fans, light fixtures, and corners for cobwebs first. Any dust that falls will be vacuumed up when you finish the floors last.

3. Wipe the “Touch Points”

Don’t forget the areas humans touch daily:

  • Light switches and outlet covers.
  • Door handles and frames.
  • Cabinet hardware.

4. The Kitchen Deep-Dive

The kitchen is often the hardest room to get right.

  • The Oven: Use a heavy-duty cleaner or the self-clean cycle (but do this a few days before you leave, as it can be smelly).
  • The Fridge: Pull it out! Clean the floor behind it and vacuum the coils. Inside, remove the shelves and soak them in warm, soapy water.
  • Cabinets: Vacuum the crumbs out of the drawers and wipe down the interiors.

Part 2: The Move-In Clean (The Fresh Start)

Even if the previous owners said they “deep cleaned,” you’ll likely want to do it again for your own peace of mind. It’s much easier to clean a house before your furniture arrives.

1. Sanitize the Bathroom

This is the first room you should tackle.

  • The Toilet: Replace the toilet seat for a truly fresh start (it’s an inexpensive way to feel “new”).
  • The Shower/Tub: Scrub the grout and check for mold or mildew.
  • The Medicine Cabinet: Wipe out the shelves where your toothbrushes and medications will live.

2. Tackle the “New Home” Smell

Sometimes a new home smells like… someone else.

  • Clean the Walls: Walls hold onto odors and oils. Wipe them down with a mixture of water and a splash of white vinegar.
  • Wash the Windows: Let the light in! Clean the glass, but also vacuum the tracks where dead insects and dust accumulate.

3. Deep Clean the Floors

Before you lay down rugs or set up the bed, treat the floors.

  • Carpets: Rent a professional steam cleaner. You’ll be shocked at what a “clean-looking” carpet can hold.
  • Hardwood/Tile: Sweep, then mop with a cleaner appropriate for the material.

4. Change the Filters

One of the best things you can do for the air quality in your new home is to replace the HVAC filters and the range hood filter in the kitchen immediately.

The Essential Moving Cleaning Kit

Keep these items in a separate “Cleaning Day” box so they don’t get lost in the moving truck:

  • All-purpose cleaner and a disinfectant spray.
  • Microfiber cloths (lots of them!).
  • Glass cleaner.
  • A vacuum with attachments for corners.
  • A mop and bucket.
  • Steel wool or a scrub brush.
  • Trash bags (heavy-duty).
  • Baking soda and white vinegar (the ultimate natural cleaning duo).

The Pro Tip: When to Hire Professionals

Moving is physically taxing. If your budget allows, consider hiring a cleaning crew for a “Move-In/Move-Out” service.

  • Hire them for the Move-Out: To ensure you get your security deposit back without the stress.
  • Hire them for the Move-In: So you can walk into your new home and start unpacking immediately without needing to scrub a bathtub first.

Final Thoughts

Cleaning while moving is about more than just hygiene; it’s about ritual. Scrubbing away the remnants of the past and preparing a sparkling space for your future helps you transition into your new home with clarity and peace.

Happy moving!

When you think of a clean home, you probably think of harsh chemicals and the stinging smell of bleach. But what if the secret to a sparkling kitchen and a fresh-smelling living space was sitting right in your fruit bowl?


Lemons are nature’s powerhouse cleaners. Their high acidity, antibacterial properties, and incredible scent make them the ultimate eco-friendly tool for a deep clean. Best of all? They’re cheap, non-toxic, and safe for your family and pets.

Here are 6 genius ways to harness the power of citrus for a cleaner house.

1. Refresh Your Garbage Disposal

Over time, garbage disposals start to develop an… interesting aroma. Instead of using chemical deodorizers, cut a lemon into chunks and toss them down the drain. Run the disposal for a few seconds with a steady stream of cold water. The acidity cuts through grease, while the essential oils in the peel leave your kitchen smelling like a fresh orchard.

2. Make Your Microwave Sparkle

Forget scrubbing for 20 minutes. Fill a microwave-safe bowl with one cup of water and squeeze in the juice of half a lemon (you can drop the rinds in there, too!). Microwave on high for 3–5 minutes until the water boils and the window gets steamy. Let it sit for another 5 minutes before opening the door. The steam will loosen all the caked-on food, allowing you to wipe the interior clean with a simple paper towel.

3. Polish Your Chrome Faucets

Hard water stains and soap scum can make your chrome fixtures look dull and tired. Simply slice a lemon in half and rub the cut side directly onto your faucets and showerheads. Let it sit for a few minutes, then rinse and buff with a soft microfiber cloth. The citric acid dissolves mineral deposits, leaving your fixtures with a mirror-like shine.

4. Remove Cutting Board Odors

Wood and plastic cutting boards are notorious for holding onto the smells of onions, garlic, and fish. After washing your board, sprinkle a generous amount of coarse sea salt over it. Use half a lemon as a “scrub brush,” pressing down firmly and working the salt into the board. The salt acts as an abrasive, while the lemon acts as a natural disinfectant and deodorizer.

5. Brighten Your Whites

Stop relying on harsh chemical whiteners. Add a half-cup of lemon juice to your laundry water during the soak cycle for white clothes. The natural bleaching properties of the citric acid help lift dinginess and yellowing, leaving your whites looking crisp and smelling naturally fresh. Note: Only use this on whites, as lemon can have a lightening effect on colors!

6. Deodorize Your Trash Can

If your kitchen trash can has hit the “point of no return,” lemon is your best friend. After emptying the bin and giving it a quick wash, place a few lemon rinds at the very bottom before putting in a new bag. It acts as a continuous odor-absorber, neutralizing smells before they can spread through your kitchen.


A Final Pro-Tip:

Always remember to rinse surfaces well after cleaning with lemon. While it’s a natural ingredient, the acidity can be harsh on certain materials like natural stone (granite or marble) if left for too long.

Ready to make the switch to a cleaner, zestier home? Grab a bag of lemons on your next grocery run and let nature do the hard work for you!

It’s a scenario that strikes fear into the heart of every homeowner and car owner: you reach down to adjust a cushion or slide into the driver’s seat, only to feel that unmistakable, stretchy, and incredibly stubborn resistance.

Chewing gum.

Whether it’s a gift from a forgetful toddler or a stray piece from a houseguest’s pocket, gum on upholstery feels like a permanent disaster. But before you consider reupholstering the sofa or buying seat covers for the car, take a deep breath. With the right technique, you can remove gum from almost any fabric without leaving a trace.

Here is your professional guide to winning the battle against the stick.

The Golden Rule: Do Not Rub!

Before you reach for a rag, remember the first rule of gum removal: never rub or scrub. Rubbing pushes the gum deeper into the fibers of the fabric and spreads the mess, turning a small problem into a giant stain. Your goal is to lift the gum up and away from the upholstery.

Method 1: The Ice Method (The Gold Standard)

This is the safest and most effective method for most fabrics, including velvet, polyester, and cotton. By freezing the gum, you make it brittle, allowing it to snap off the fibers.

  1. Freeze it: Place a handful of ice cubes in a zip-top plastic bag (this prevents water from soaking into the fabric). Place the bag directly onto the gum and leave it for 10–15 minutes until the gum is rock hard.
  2. The Scrape: Use a blunt tool, such as a butter knife, a credit card, or a metal spatula. Gently pry up the edges of the hardened gum.
  3. The Lift: If the gum is frozen enough, it should pop off in one or two large chunks.
  4. Repeat: If any residue remains, re-freeze and repeat.

Method 2: The Hairdryer Method (For Delicate Fibers)

If the gum is deeply embedded or the fabric is particularly delicate, heat can sometimes be more effective than cold.

  1. Heated Air: Aim a hairdryer at the gum on a medium setting. Watch closely—you want the gum to become soft and pliable, but you don’t want to melt synthetic upholstery fibers.
  2. The Peel: Once the gum is soft, use a plastic bag or a piece of plastic wrap to “blot” the gum. The gum will prefer to stick to the plastic rather than the fabric.
  3. Caution: Be extremely careful with silk or high-synthetic blends, as high heat can cause permanent damage.

Method 3: The Vinegar Solution

For stubborn residue or natural fibers like wool, white vinegar is a miracle worker. The acid in the vinegar breaks down the polymers in the gum.

  1. Heat the Vinegar: Warm a small bowl of white distilled vinegar in the microwave.
  2. Dab: Dip a soft cloth or an old toothbrush into the warm vinegar and gently rub it into the gum area.
  3. Work it in: The gum will begin to ball up and soften. Gently lift it away with your blunt tool.
  4. Rinse: Since vinegar is acidic, wipe the area with a damp cloth and a drop of dish soap afterward to neutralize the scent.

Method 4: Rubbing Alcohol (For Tough Residue)

If you’ve removed the bulk of the gum but a “ghost” of sticky residue remains, rubbing alcohol is your best friend. It acts as a solvent that dissolves the adhesive without damaging most fast-color fabrics.

  1. Spot Test First: Always apply alcohol to a hidden area first to ensure it doesn’t bleed the dye of your upholstery.
  2. Dab: Soak a cotton ball in rubbing alcohol and press it onto the residue.
  3. Wipe: Let it sit for a minute, then gently wipe away with a clean cloth.

How to Clean the “After-Stain”

Once the gum is gone, you might see a slight oily mark or a shadow where the gum once lived. Here is how to finish the job:

  • Mix a solution: Combine 1 cup of warm water with a teaspoon of clear dish soap.
  • Blot: Using a white microfiber cloth, blot the area from the outside in (to prevent spreading).
  • Dry: Pat the area with a dry towel and use a fan to dry it quickly to avoid water rings.

When to Call a Professional

While these DIY tips work for 90% of household accidents, there are times when you should put down the ice cube and call a professional cleaner:

  • Antique or Vintage Fabrics: If the upholstery is an heirloom or very old, the fibers may be too brittle for DI
    Y scraping.
  • “Dry Clean Only” Tags: If your sofa is marked with a “S” (Solvent only) or “X” code, water-based methods or vinegar could ruin it.
  • Suede and Raw Leather: These materials are incredibly finicky and easily stained by DIY solvents.

Final Thoughts

Finding gum on your favorite chair is frustrating, but it isn’t the end of the world. By staying calm and using the “freeze and scrape” method, you can usually restore your upholstery to its former glory in less than twenty minutes.

Pro Tip: Keep a small “stain kit” in your laundry room with specialized adhesive removers (like Goo Gone) just in case—but always remember to check the fabric compatibility first!

No one wants to share their home with pests. From ants and cockroaches to rodents and flies, unwanted visitors can quickly turn a comfortable space into a stressful one. The good news is that with the right habits and regular cleaning, you can keep your home pest-free all year round.


1. Keep Your Home Clean and Clutter-Free

Pests are attracted to dirt, food crumbs, and clutter. Regular cleaning is your first line of defense. Wipe down surfaces, vacuum floors, and make sure no food residue is left behind—especially in the kitchen and dining areas. Decluttering also removes hiding spots where pests can breed and multiply.


2. Store Food Properly

Leaving food exposed is an open invitation for pests. Always store food in sealed containers and avoid leaving leftovers uncovered. Make sure pet food is not left out overnight, and clean up spills immediately.


3. Dispose of Waste Regularly

Overflowing bins and uncovered trash attract insects and rodents. Take out your garbage daily if possible, and always keep bins tightly sealed. Cleaning your bins occasionally can also help eliminate odors that attract pests.


4. Seal Entry Points

Pests can enter your home through the smallest cracks and gaps. Check around windows, doors, pipes, and vents for any openings, and seal them properly. Installing door sweeps and window screens can also help keep pests outside where they belong.


5. Eliminate Moisture

Many pests thrive in damp environments. Fix leaking taps, pipes, or drains, and ensure your home is well-ventilated. Pay extra attention to areas like bathrooms, kitchens, and basements where moisture can build up.


6. Maintain Your Surroundings

Your home’s exterior matters too. Keep your yard clean, trim overgrown plants, and avoid letting water collect around your property. This reduces the chances of pests making their way indoors.


7. Don’t Ignore Early Signs

Droppings, unusual smells, or small holes in walls and furniture can be early signs of a pest problem. Addressing these signs quickly can prevent a bigger infestation later.